
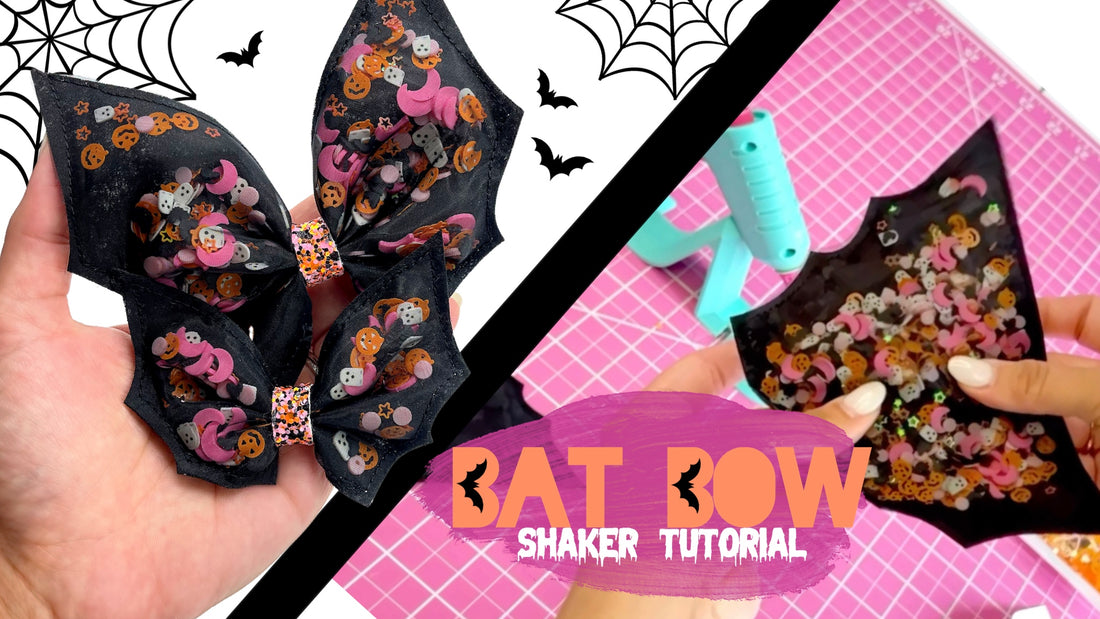
Get ready to embrace the Halloween spirit with a whimsical and playful bat shaker bow! In this step-by-step tutorial, we will guide you through the process of creating this enchanting accessory using the instructions from Pip Supply's "Bat Bow Shaker Tutorial." With a touch of creativity and a sprinkle of glitter, you'll have a one-of-a-kind bat shaker bow to add a dash of charm to your Halloween ensemble. Let's dive in and craft together!
Materials Needed:
- Bat-shaped felt shaker bow exclusively found at Pip Supply
- Glitter or small decorative clays found here
- Funnel
- Hot glue gun or fabric tape
- Thread or rubber band
- Glitter faux leather strip
- Hair clip or hair elastic (optional)
Step 1: Prepare the Bat Shaped Felt Take the bat-shaped felt and locate the hole between the felt layers. Using your fingers, gently open the hole and place a funnel inside.
Step 2: Add Glitter or Decorative Clays Take your desired amount of glitter or small decorative clays and carefully pour them into the funnel, allowing them to flow into the space between the felt layers. Adjust the amount to achieve the desired shaker effect.
Step 3: Seal the Opening Once the glitter or clays are inside the bow, close the opening with a small amount of hot glue or fabric tape. Ensure the seal is secure to prevent any leakage. Give the bow a gentle shake to see the magical effect.
Step 4: Fold and Evenly Distribute the Bow Fold the bat-shaped felt in half, making sure that no clays are in the center, but that they are evenly distributed on both sides. Adjust the clays if needed to create a balanced appearance.
Step 5: Secure the Folded Bow Fold the bow in an accordion-style down the middle, maintaining the even distribution of the clays. Secure the folded bow by wrapping thread or a rubber band tightly around the center. This will help maintain the desired shape.
Step 6: Wrap the Center with Glitter Faux Leather Take the glitter faux leather strip and wrap it around the center of the folded bow. Apply hot glue to one end of the strip and press it firmly against the back of the bow. Wrap the strip tightly around the center, overlapping the ends, and secure them with hot glue.
Step 7: Personalize and Style If desired, add your personal touch by incorporating additional decorative elements like rhinestones, ribbons, or charms. Apply hot glue to the chosen embellishments and place them strategically on the bow, allowing your creativity to shine.
Step 8: Optional Attachment If you prefer to wear the bow as a hair accessory, you can attach a hair clip or hair elastic to the back. Apply hot glue to the desired attachment point and press the clip or loop the elastic through, ensuring a secure hold.
Step 9: Show Off Your Bat Shaker Bow Congratulations! You've created a delightful bat shaker bow. Give it a shake and admire the magical effect of the glitter or clays inside. Wear it proudly as a statement piece for your Halloween celebrations or as a playful addition to your costume ensemble.
Now that you've mastered the art of crafting a bat shaker bow, let your imagination soar! Experiment with different colors, glitters, or clays to create unique variations of this whimsical accessory. Wear it with pride, and let the playful spirit of Halloween shine through your fabulous bat shaker bow!
Find more great tutorial like this one from us here.
To take your creativity to even the NEXT LEVEL be sure to join our free Crafting with Pips Facebook group as well!